
How To Fix Runner’s Knee And Get Rid Of Knee Tendon Pain
May 2022 - Updated Video with more tips to fix your knee pain when running
Now you might be familiar with runner's knee it's something runners talk about fairly often. Runner's knee, also known as patellar tendonitis, can put you out of action meaning that you can't run or train.
So in today's blog post, we're going to show you how to identify whether you have runner's knee, and how to fix it so you can get back to running pain-free again.
Now before we get into today's blog post, we're not doctors! So if your knee is swollen, you're in a lot of pain, or it could be something worse, go and see your GP or your physical therapist!
How the knee works

Before we get into identifying your knee injury, let's get into how the knee works. So you've got the kneecap, also known as the Patellar, situated over the knee joint. The Patellar is held in place by the muscles and then the tendons that are connected to those muscles. So you've got the quadriceps tendon coming out above the patella and then that goes into your quadriceps muscle, and then beneath that, we have the patella tendon so that connects from the patella down into the top of the tibia.
What is runner’s knee?
Runner's knee is typically discomfort or pain around the kneecap patella region. It's not only runners that suffer from this condition but it can be caused by any activity that stresses the knee joints, such as walking, jumping, skiing, football, and rugby.
How do I know it’s runner’s knee?
The first step with any injury is to identify the problem correctly so you can put the right plan in place to get back to running.
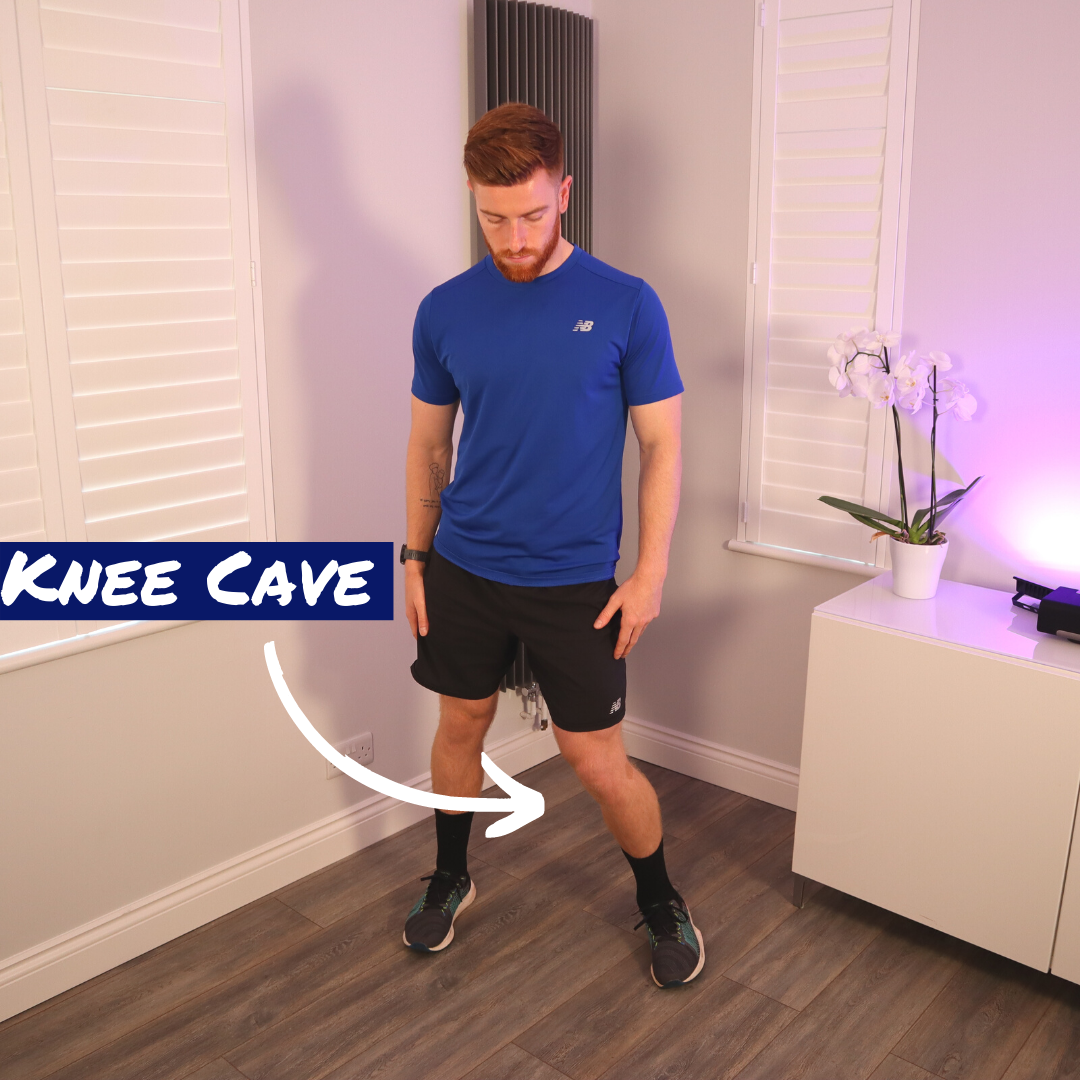
If it's truly runner's knee you may be experiencing a dull aching feeling above, below, or even behind the kneecap. But it's typically somewhere just below the knee cap and above the shin bone that people feel that pain. You might also be feeling or hearing popping and grinding noises in the knee, you might be experiencing some swelling or inflammation at the knee joint, and when you run your knee may cave in a little bit like the image below:
This is the first stage, identifying whether you have runner's knee or not. If you're experiencing any of the symptoms that we just mentioned then this blog post is for you!
To see if it’s load-related pain around your knee, we need to do two tests. If it's load-related pain this means the tendons on the front of your knee are unable to cope with the forces that you're putting through it.
Test 1 – the bodyweight squat
The first test that you’re going to do is a bodyweight squat and when you do this you’re looking for a pain reading on a scale of 1- 10, 1 being no pain and 10 being as painful as it can be.
To do the bodyweight squat:
Stand with your feet parallel with a comfortable distance apart and your weight evenly distributed between both legs
Keep your chest up and your back straight
Bend at your knees, then the hips, and lower your bum towards the ground behind you
When you're squatting you want to go as low as you can with control. Ideally, your hips should go below your knees, like this:

From the bottom of the squat, you should push back up in a controlled manner. Make a note of how painful the bodyweight squat is on a scale of 1-10.
Test 2 – tuck jumps
The second test to identify if your knee pain is load-related is tuck jumps. Again, when you do this you want to be thinking about how painful this exercise is, 1 being no pain 10 being as painful as it can be.
To do a tuck jump:
Use the force of your thighs and abs to jump up and off the ground you can use your arms to gain momentum
Angle your knees as you jump to bring them as close as possible to the chest
As you land back on the ground try to ensure that your legs are stretched out and parallel or roughly around shoulder-width apart and then immediately go down into the deep squat position
What you'd expect to see, if you have runner's knee, is the bodyweight squat shouldn't be painful and the tuck jump should be painful. If this is the case you have load-related pain around the knee, and that means the tendons on the front of your knee are unable to cope with the forces you're placing them under.
Why have I got runner’s knee?
Every time you place stress on your body, muscle tissue is broken down and then regenerated. This regeneration process is how strength is built.
Everyone is different and depending on a number of factors like your weight, how much you've exercised, if you have diabetes, and much more, will depend on the strength and what your tendons can currently tolerate.
For example, someone that's exercised three to four times a week for the last year will have stronger tendons and will be able to cope with more force than someone who's just starting out.
An important thing to note here is after exercise, your tendons will return to normal with 2-3 days proper recovery. But if you push past what they can currently cope with, this is when you're going to get problems and pain.
If you're a 5k runner, and you’re only used to running 5k’s, and then you go and run a marathon… this would be too much stress on your tendons because you haven't trained and strengthened your tendons to be able to cope with this distance. There's a lot of constant pounding on the ground involved in running and whether you’re running a 5k, 10k, or a marathon they’re all going to place a lot of stress on your body and tendons.

Think of your tendons strength like a suntan. When you increase your sun exposure gradually you develop a tan, this allows you to spend more time out in the sun without harm. If at any point you exceed your normal sun exposure significantly you'll end up with a burn that will require you to spend some time healing. Once you've recovered from the sunburn it doesn't mean that you're allergic to the sun, but that you need to gradually increase your sun exposure to redevelop your tan.
This is why it's important to take it easy and build yourself up slowly when running. You need to give your body and tendons time to adjust and get stronger.
Now that we know that you have runner's knee and why it happens, let’s move onto…
The first stage of fixing your knee pain and runner’s knee
The first stage of fixing your knee pain involves heavy isometric exercises. Heavy isometric exercises can reduce your pain for up to 45 minutes and also increase muscle activation. The exercises should be around 70-80% of your maximum effort and it should feel like a 7 out of 10. There’s two exercises for you to try, for both you should be holding the position for 45 seconds and repeating this 5 times.
The single-leg wall sit
The first exercise is a single leg wall sit, which is great if you don't have any equipment.
Here’s how to do a single leg wall sit:
With your back against the wall and your feet out in front of you you're going to slide down the wall
Sit with your knees bent at around 60 degrees
So let's say in this case that your right knee is injured that should be the one that stays in contact with the floor. Your good leg should raise up. Like I mentioned earlier, what you want to do is you want to hold this position for 45 seconds and then repeat it five times.

If the single-leg wall sit is too easy, it means there wasn't enough load on your tendons. So in this instance, you'd need to try a Banded Spanish Squat instead.
The banded spanish squat
The Spanish Squat is basically a reverse wall sit.
To do the Banded Spanish Squat:
Grab a thick band and loop it around something that won't move like a squat rack
Place the band behind your knees at the top of your calf
Keep your toes facing that band attachment, so it's at the top of your calf and your toes facing the attachment
Keeping your back straight and chest up, squat down as deeply as possible
Hold this position for 45 seconds and repeat it five times

If neither of these exercises reduce your knee pain and actually increase it, you're likely to be dealing with a different knee injury.
So that's the first step in fixing your runner's knee. Now you’ve reduced your pain and got your muscles around the knee activating more, now you need to reduce your training volume.
If you're a runner that's doing three runs a week you might want to do two easier runs interspersed with walking periods. The important thing here is you don't want to stop training altogether because, if you do you won't fix the problem by stopping, your tendons won't get stronger, and you'll be back at square one with knee pain and the same problems will occur again.
The second stage of fixing your knee pain and runner’s knee - Add more load to your tendons
What you need to do here is heavy slow resistance training. The tendon is like a spring so the faster you use them the more power and load that you're going to place on them, running, jumping, and sprinting will all place a lot of stress and strain on the tendons which will be painful for you if you have runner's knee. This is why we need to move away from running and other fast movements, temporarily, to slower heavier resistance training.
Adding more load to your tendons with a barbell box squat
To do the barbell box squat:
Stand in front of the box or bench with your feet parallel and comfortable distance apart with your weight evenly distributed between both legs
Place the barbell on the cushioned part of the upper back, hold the bar with both hands, keeping your elbows directly below your wrists
Keeping your chest up you want to bend at the knees, then hips, and lower your bum down towards the box behind you
Touch the box with your bum, pause for a second, and then keeping your heels on the ground push yourself back up to the starting position
For this exercise, you should do it for 3 seconds on the way down and then 3 seconds on the way up. This means you can load the tendons without making them angry. For this exercise, you should do 4 sets of 15 reps, so it's important that you choose a weight that allows you to do that.

If this heavy slow resistance exercise is too easy, here's another exercise that you can try…
Adding more load to your tendons with the bulgarian split squat
To do The Bulgarian Split Squat:
Hold a dumbbell in each hand with your feet hip-width apart
Place your rear foot on the bench behind you, your feet should be about a large stride length apart
Lower your hips towards the floor, so that your rear knee comes close to the floor
Pause at the bottom and then pushed through the front of the foot, keeping your heel in contact with the floor, and returning back to the start position
For this exercise, you should do it for 3 seconds on the way down and then 3 seconds on the way back up. For this exercise you should do 4 sets of 15 reps, so choose a weight that will allow you to do that.

The third stage of fixing your knee pain and runner’s knee - testing your knee
Now that you've done the first and second stages of fixing your knee pain you need to test your knee. Remember at the start of the blog post when we did the bodyweight squat and tuck jumps to identify your runner's knee?
This is how we're going to test your knee pain and the progress that you've now made. 24 hours after doing the exercises try a few tuck jumps again. Was there more or less pain than before?
If there's less pain, you did just enough to reduce your pain levels and improve the load tolerance of your tendons. If there's more pain you did too much if this is the case you need to spend less time on the isometrics and do less weight and reps on the heavy slow resistance exercises.
Final thoughts
Ultimately there is no one-size-fits-all, everyone's different, and everyone's recovery journey will be different. When you start to feel better by following the process you can start to reintroduce more runs into your training. We'd recommend starting with walk runs, walking for a period of time, and then running.
This is the time when you need to listen to your body. This is the same rule that we apply to people we work with that are coming back from a knee injury, don't progress your run times or distance more than 5-10% each week, and if it hurts stop and reduce your training volume. There's a difference between being in pain and a run being painful.
That’s how you identify whether you have a runner’s knee and how to fix knee tendon pain, so you can get back to running again pain-free. We hope you found this blog post useful.
If you want to find out more about how to improve your run times we've got a free seven-day video series that goes through how you can get faster run times and also prevent injury.
If you found this blog post useful, or you know someone that will benefit from reading this, please share it with them.